
Need Help?
Call us! (877) 219-3936
Call us! (877) 219-3936

The welding gun or torch, electrodes, and welding machine are the first items that spring to mind when you think about welding. However, welding goes beyond these. There are a lot of useful things that you can use to help yourself and stay safe when welding.
Welding was once thought to be a costly job because the equipment required a substantial financial investment. But aside from the welder, you won't need many more tools if you're just starting off.
As a result, we've compiled a list of the top 10 welding tools for newbies. Buckle up—some will help you learn welding, while others are necessities!
Let's start by quickly going over what the welding tools are. If you are new to welding, you should know the difference between welding tools and welding materials. Welding equipment includes a welder, welding torches, MIG guns, electrodes, and other welding tools.
Right out of the box, manufacturers give you all the welding gear you need to start welding. On the other hand, you can buy extras like a spool gun, different TIG torches, and more to make your welding better.
Welding tools, on the other hand, are extra tools like pliers, grinders, or cutting hammers. In contrast to other essential welding equipment, you can weld without the use of welding tools, but they can significantly simplify the process. There are a lot of useful welding tools on the market today, but we will only talk about the ones that are most important for new and starting welders.
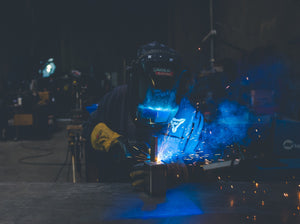
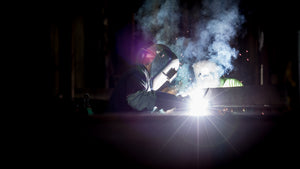
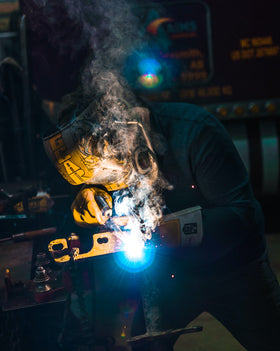
While a welding helmet is more of a piece of protective equipment, it is still something that every welder, even those who are just starting out, should have. The welding helmet is an important piece of equipment for safe welding, and most people don't get one when they buy their first welder.

If you stand too close to the weld, the intense light, UV, and IR radiation from the arc can burn your face and hurt your eyes. A simple but useful solution is to wear a welding helmet. The helmet's lens safeguards your eyes, while the face shield prevents burns on your face.
We recommend an auto-darkening welding helmet like the Optrel Helix CLT 1050.200 for those who are new to welding or just starting out. The auto-darkening feature is great for all welders, even those who are just starting out. Immediately, the helmet's lightweight assists you in aiming your torch and initiating the weld. When you start the arc, the sensors pick it up and turn on the function that dims the light to protect your eyes.
This is why many welders who switched from old helmets to ones that darken automatically say, "I was blind, and now I can see!" We strongly advise all welders, even those who are just starting out, to wear auto-darkening helmets. If you don't want to wear a helmet in the workshop, at least wear safety glasses to keep sparks and other projectiles from getting into your eyes.
If you are new to welding, you should definitely get some welding gloves. They are an important part of PPE, or personal protective equipment. Some types of welding, like MIG welding and stick welding, use the heat from an arc to melt and join pieces together. The heat can burn your hands, and the sparks and spatter that fly around are not fun.

That's why you should always wear gloves when you weld. Even though any gloves are better than not having gloves on at all, some will make it easier to weld.
A welding jacket, welding boots, and welding sleeves make up the rest of the safety gear. Even though these are important pieces of PPE, as a beginner, you only need to wear long sleeves and closed-toed shoes.
A wire brush is a simple welding tool that can make your joints much stronger. It will be needed to prepare for the weld and clean up afterward.
To get started, use a brush to remove any light dirt, paint, or rust from the base metal surface. Welds that are clean take less time to clean up if the surface is clean before welding.
After the welding process, clean the base metal with a wire brush. It can get rid of light spatter, char, and slag. As a result, it's a versatile tool that can help you make clean welds.
When purchasing a wire brush, think about the metal you are welding. You can use a simple metal wire brush on either mild steel or carbon steel. However, if you are welding aluminum or stainless steel, you should always use a stainless steel brush. Use two separate stainless steel brushes to keep them from getting dirty if you want to weld aluminum and stainless steel together.
In stick welding and flux-cored arc welding, a chipping hammer plays a crucial role in removing slag. When a self-shielded wire or electrode flux hardens on top of the weld, slag forms, keeping the metal clean from airborne particles. Remove it after welding, especially if you make multiple passes. The chipping hammer's flat and pointed side makes removing slag easy, with different types on each side.
You can get a chipping hammer with a flat handle or one that absorbs shock. If you frequently chip, opt for the hammer with shock absorbers to prevent overuse injuries.
Hardware stores carry some welding tools, such as MIG pliers. However, you may not know how useful they are for welding, particularly GMAW. They feature a wire-cutting part, several round clamps, and a pointy end that can assist with the following tasks during MIG welding:
Welding clamps are extremely important because they will help you keep your welding pieces in place. Putting everything in place before you weld will help you be much more precise, which is extremely important if you are new to welding.
There are different kinds of clamps that you will need, depending on the project. However, the most commonly used clamp is the well-known C-Clamp. It is the easiest and most accessible thing you can do, and having a welding table is helpful. This clamp's pressure from above and below keeps the welded pieces firmly in place, making it useful for many other metalworking tasks besides welding.
It's not like most clamps, where the base pieces are held to the surface by welding magnets. They will help you line up and stick two or more pieces that you are going to weld together. When you want to weld pieces at an angle that needs support, magnets come in handy. Magnets can help you join the metal pieces together in ways that clamps couldn't.
Although you can use an angle grinder for many tasks, learning how to use it may be more challenging than with some of the other tools on this list. But once you learn how to use this tool properly, it will be an important part of your welding arsenal.
To begin, you can cut metal with an angle grinder before welding. Before plasma cutting became common and inexpensive, many welders preferred to cut metal with angle grinders.
Similar to a wire brush, an angle grinder can prepare metal and clean up after welding. Finally, we use grinders to clean and prepare surfaces for welding. But because they are so strong, you can use them to grind away much thicker layers of dirt, rust, paint, or any other flaw.
You can use a grinder to cut through thick, hard spatter that adheres to the base metal after a weld. You can also use it to remove slag that a chipping hammer cannot remove. Finally, you can use the grinder to make the surfaces of your new weldment look nice.
Another tool you can use instead of an angle grinder is a metal file, which is much easier for beginners to use. They are also very affordable. A metal file will allow you to work with smaller pieces and smooth out the smaller details more precisely. It will take some time and work to get rid of burrs and sharp edges, but many people find it easier to use than a grinder.
However, most people will agree that files are much better for cleaning up after welding and making things look good. When compared to grinders, files aren't good for making smooth welds or getting rid of thicker contaminants.
You will also need measuring tools for metalworking, metal fabrication, and welding, which are all very precise tasks. Working with steel and welding requires a multitude of measuring tools.
Levels, tape measures, metal rulers, and digital calipers will most of the time help you get the measurements of the metal pieces right. However, specific measuring tools for the welding process exist, such as speed squares, hi-lo gages, fillet gages, and sheet metal gages.
For both new and experienced welders, a sheet metal gauge is a pretty useful tool. You can use the holes in this gauge to find out how thick the metal you're about to weld is. To read the value, just slide the metal into a hole that's just right.
A speed square is another useful measuring tool that looks similar to a right triangle. This is an angle measuring tool that will help you find the length of a piece that is straight across from another piece for a 90-degree cut or any other angle.
For more complex tasks, you can use filet gages and hi-lo gages to find out the throat thickness, leg length, angle of preparation, or extra weld metal. Initially, you shouldn't be overly concerned about these as their primary purpose is to verify if the weld satisfies the standards.
After you measure your parts, mark them so you know where to cut or weld them. To do this, you will need marking tools. You can use regular markers or those specifically designed for metal.
If you want to mark white metals, permanent markers work well, as long as they stick well. The best thing about markers is that they are affordable and work well. They don't stick well to darker metals, though, and they can leave a mark after small cuts.
Setting up cut lines on carbon steel is easy with soapstone, which is also very cheap. These markers aren't made of soap, but they leave marks that are similar in texture and are easy to wipe off after use.
Many people mistake soapstone welding markers for metal-specific chalk because they contain talc and various amounts of chlorite and amphiboles. Sharpening them makes perfect marks on the metal you are about to weld or cut. They are cheap and not too hard to use. If you want to look better overall, the marks are easy to get rid of after the procedure.
A welding table or workbench isn't a normal welding tool, and you don't have to have one. But having a dedicated and stable metal surface to weld on will help anyone who is just starting to learn how to do it. As a result, we recommend it as an extra for anyone just starting out.
Welding tables are great because they have holes designated for clamping your pieces and working metal perfectly. For safe and accurate welding, it's important to keep your work area clear, so some models come with extra parts that can help you store your torch or consumables. You will also get into the habit of keeping your workspace clean and organized if you have a table.
One more good thing about welding tables is that you can make your own as you learn how to use one. With the above welding tools, you can measure, mark, cut, and weld the pieces together to make a welding table that is just right for your needs.
Welding tables typically accompany welding carts. On a welding cart, you can store your welder, gas cylinder, and other essential tools and supplies. These are also not necessary at first, but you may find them useful later on. Once you're skilled at welding, you can also make your own welding cart.
No matter how experienced you are as a welder or if you are just starting out, welding tools will make the process much easier. When you first start welding, stick to the most basic tools and learn how to use them correctly.
At first, you don't need everything. Work on your welding skills and the tools you need. The more you progress, the better tools you'll need, and you'll know how to use the best ones by then.
Leave a comment